
Transforming an unfinished basement or raw addition into a polished living space is one of the most rewarding home improvement projects you can tackle. However, moving from rough lumber to flawless trim requires more than just patience, it requires using the right tool at the right phase of construction.
Using an undersized fastener on structural studs compromises safety, while using a heavy framing tool on delicate crown molding leaves unsightly holes. Below is a comprehensive, step-by-step walkthrough detailing how to navigate a room build from start to finish—including the ideal Freeman power tools engineered for every stage.
Step 1: Laying the Foundation & Framing the Walls
Every great room starts with a square, sturdy frame. Whether building a partition wall or finishing concrete basement walls, structural integrity is paramount.
[ Layout Bottom & Top Plates] ➔ [ Mark Stud Centerlines (16" O.C.)] ➔ [ Fasten Framed Assemblies]
The Process:
-
Layout & Snap Lines: Map out your top and bottom plates using a chalk line. If installing over basement concrete, use pressure-treated lumber for the bottom plate.
-
Stud Spacing: Mark studs at 16 inches on-center (O.C.) to ensure standard insulation batts and drywall panels fit seamlessly later.
-
Assemble Wall Sections: Frame walls flat on the floor before tipping them up into position, securing top plates directly into the overhead joists.

Tool Spotlight: Freeman 21° Full Round Head Framing Nailer (PFR2190)
High-stress framing demands maximum hold. The Freeman 21° Framing Nailer drives 2" to 3-1/2" plastic-collated full round head nails, making quick work of framing wall assemblies, headers, and corner posts without jams or misfires.
Step 2: Installing Insulation & Vapor Barriers
Once the rough framing, electrical, and plumbing inspections are complete, it's time to seal the envelope to keep your space warm, quiet, and moisture-free.
The Process:
-
Fit Insulation: Place fiberglass or rockwool batts snug between stud bays, ensuring no gaps around electrical boxes.
-
Apply Vapor Barrier: In basements or exterior walls, cover the studs with 6-mil polyethylene sheeting to prevent moisture infiltration.

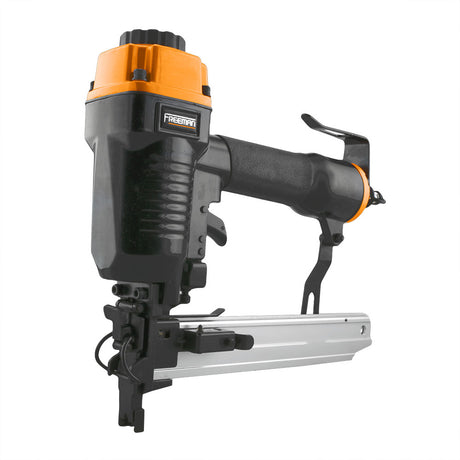
Tool Spotlight: Freeman 1/4" Crown Fine Wire Stapler (PST9040Q)
Securing thin vapor barrier plastic or paper-faced insulation requires wide surface tension so the material doesn't tear under pressure. The Freeman fine wire pneumatic stapler delivers rapid-fire stapling with precision depth control, locking moisture barriers tightly against wood studs without puncture damage.
Step 3: Hanging & Finishing Drywall
Drywall marks the major transition point from rough construction to interior finishing. Proper fastener placement here prevents popped screw heads and cracked seams down the road.
The Process:
-
Hang Ceiling Panels First: Always hang ceiling drywall before wall panels so the wall sheets help support the ceiling edges.
-
Fasten Sheets: Drive fasteners every 12 inches on center along stud lines, sinking the fastener head just below the paper surface without tearing through it.
-
Tape & Mud: Apply joint compound and paper tape in thin layers, sanding smooth between coats.
Step 4: Hanging Doors & Door/Window Casings
With walls smooth and painted, you transition from heavy construction to precision finish carpentry. Installing pre-hung interior doors and wide window casings requires rigid holding power that won't split thick jambs or decorative wood.
The Process:
-
Set Door Frames: Plumb, level, and shim pre-hung door jambs at hinge locations.
-
Attach Door Casing: Fit trim flush around door jambs with a 3/16-inch reveal.

Tool Spotlight: Freeman 15-Gauge 34° Angled Finish Nailer (PFR3490)
Because door jambs and heavy casing pieces carry structural load (from swinging doors), thin brad nails aren't strong enough. The Freeman 15-Gauge Angled Finish Nailer drives heavy-duty 1-1/4" to 2-1/2" finish nails. Its 34-degree angled magazine lets you fit comfortably into tight corners and door jams.
Step 5: Baseboards, Crown Molding & Fine Trim
The final stage is where detail shines. Thin profile baseboards, quarter-round shoe moldings, and delicate crown moldings require low-visibility fasteners that leave minimal holes for wood filler.
[ Miter Baseboard Corners (45°) ] ➔ [ Fasten into Wall Studs ] ➔ [ Pin Shoe Molding to Floor ]
The Process:
-
Measure & Miter: Cut baseboards with 45-degree miter joints for outside corners and coped joints for inside corners.
-
Fasten Trim: Align baseboards along the floor wall joint, securing nails through drywall directly into the bottom framing plate.
-
Attach Shoe Molding: Nail shoe molding directly to the baseboard rather than the floor, allowing floorboards room to expand naturally.

Tool Spotlight: Freeman 18-Gauge 2" Pneumatic Brad Nailer (PBR50)
Lightweight trim and baseboards require thin-gauge fasteners to prevent delicate wood from splitting. The Freeman 18-Gauge Brad Nailer drives 5/8" to 2" brad nails with a tool-free depth adjustment and a no-mar safety tip, leaving microscopic nail holes that need minimal spackle before final touch-up paint.
Final Thoughts
Building out a room is all about progression. Matching the right tool to each construction milestone ensures safety, speeds up workflow, and creates a clean, professional appearance from structural studs down to the final coat of paint on your baseboards.