
Nothing exposes shoddy finish carpentry faster than an interior door that swings shut on its own, catches on the latch plate, or displays uneven casing reveals. While lightweight hollow-core slabs might forgive a couple of misaligned brads, architectural solid-core doors and heavy 5/4" primed MDF or hardwood casing leave zero room for error.
With today’s rising material costs, split jambs and marred profiles are expensive mistakes. Lightweight 18-gauge brad nailers are fine for delicate base shoe or cove moulding, but securing a 70-pound solid-core jamb and anchoring 3-1/2" casing to rough framing demands structural holding power and surgical depth control.
Here is how career trim carpenters hang flawless, plumb pre-hung doors and dress them out with crisp casing—plus the pro fastening techniques that guarantee a lifetime of smooth swings.
The Pro Finish Fastening Arsenal
Before breaking down the step-by-step install, let’s look at the pneumatic powerhouses driving this masterclass:

-
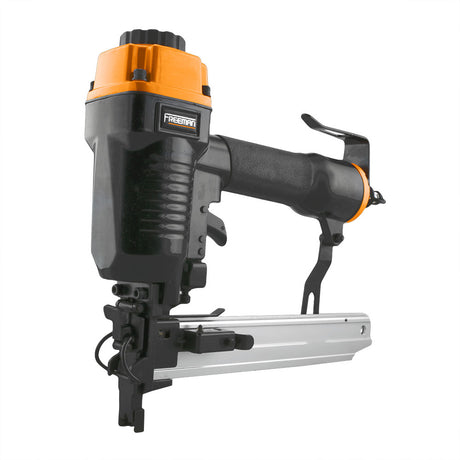
Freeman G2FN64 2nd Generation 16-Gauge Straight Finish Nailer
The Jamb-Setting Workhorse. Redesigned for improved balance and pinpoint accuracy, the G2FN64 drives 16-gauge straight finish nails from 1" to 2-1/2". It delivers the tensile strength needed to lock door jambs into framing without blowing out the stock or requiring massive wood putty patches.

-
Freeman PA20VFN1564 Cordless 34° 2-1/2" Angle Finish Nailer Kit
The Heavy Trim & Casing Anchor. Featuring an angled magazine designed to slide effortlessly into tight corner returns and close rough openings, the PA20VFN1564 shoots robust 15-gauge 34 Degree angled finish nails. The heavier gauge and angled shear strength pull thick casing tight against irregular drywall.

-
Freeman G2BR50 2nd Generation 18-Gauge Brad Nailer
The Reveal & Miter Lock. When pinning exterior miter corners or fastening delicate back-band profiles to your main casing, this brad nailer provides invisible holding power without splitting fragile miter tips.

Step 1: Prep & Check the Rough Opening (R.O.)
-
Check the Subfloor for Level: Lay a 4-foot or 6-foot level across the bottom of the rough opening where the jamb legs will sit. If the floor is out of level, note which side is high. Trim the bottom of the hinge jamb on the low side—or shim up the jamb on the high side—so the head jamb sits dead level.
-
Check the Framing for Plumb & Cross-Sight: Check the rough framing studs with your level. Look down the wall planes to ensure the drywall hasn't bellied out past the studs, which can cause severe "casing twist" later.
Step 2: The Golden Rule — Plumbing the Hinge Jamb First
The single biggest mistake DIYers make is leveling the top jamb first or nailing without adequate backing. The hinge jamb dictates the entire door operation.
-
Shim Behind Every Hinge Pocket: Never nail through an unsupported jamb. Place pairs of tapered wood shims directly behind the top, middle, and bottom hinge locations inside the rough opening gap. Shimming directly behind the hinges prevents the jamb from bowing inward under fastener tension or sagging under slab weight.
-
Plumb in Both Planes: Place a 6-foot level against the face and the edge of the hinge jamb. Adjust your shims until the bubble is dead-center in both directions.
-
Anchor with the G2FN64: Grab your Freeman G2FN64 16-Gauge Straight Finish Nailer loaded with 2-1/2" finish nails. Drive fasteners directly through the jamb and shims into the rough studding right adjacent to each hinge.
Pro Tip: Remove one factory center screw from the top jamb hinge and drive a 3" structural wood screw straight into the framing stud. This prevents heavy solid-core doors from sagging over time.
Step 3: Setting the Head Jamb & Strike Reveal
-
Set the Margin at the Top: With the hinge jamb locked down, close the door slab and check the top reveal (the visual gap between the door and the jamb). It should be a uniform 1/8" (about the thickness of two nickels).
-
Shim the Strike Jamb: Shim the latch/strike side at three points: top, middle (strike plate level), and bottom.
-
Adjust to the Slab: Close the slab completely so it rests flush against the door stop molding. Ensure the margins down the latch jamb maintain that consistent 1/8" gap from top to bottom.
-
Fasten the Strike Jamb: Pin through the jamb and shims using the G2FN64 16-Gauge Nailer, checking swing action and latch engagement between every set of fasteners.
-
Trim Shims Flush: Use a flexible Japanese pull-cut saw or multi-tool to cut the shims flush with the outer edge of the jamb.
Step 4: Installing Heavy Casing with Precision
Once the door is swinging true, it’s time to dress it out.
-
Mark a 3/16" Reveal Line: Use a combination square to scribe a light pencil line 3/16" back from the inside face of the jamb on all three sides. This consistent reveal provides visual depth and gives the hinges breathing room.
-
Anchor the Casing to the Framing: For wide 3-1/2" or 5/4" stock casing, swap to the Freeman G2AFN64 15-Gauge Angled Finish Nailer. Shoot 2-1/2" angled nails through the thick outer perimeter of the casing, directly through drywall and into the wall framing studs. The angled body lets you nail tight against perpendicular walls without scraping the finish.
-
Pin Casing to the Jamb Margin: Use your G2FN64 16-gauge (1-1/2" to 2" nails) along the inner reveal edge into the 3/4" solid jamb stock.
-
Glue & Lock Miters: Always apply wood glue to your 45-degree corner miters. Clamp them flush, then use the Freeman G2BR50 18-Gauge Brad Nailer to cross-pin through the corners from top and side, locking the miter tight while the glue cures.
Pro Tips & Seasonal Tool Care
1. Depth Adjustment Calibration
Before firing fasteners into pristine, pre-primed millwork, take 60 seconds to calibrate. Drive test 2-1/2" nails into scrap jamb stock to dial in your nailer's tool-free micro-depth adjustment wheel. The fastener head should sink exactly 1/16" below the surface—deep enough to hold wood filler cleanly, but shallow enough to avoid blowing through pre-primed wood fibers or tearing the jamb face.
2. Fall & Winter Pneumatic Tool Maintenance
Lower ambient temperatures cause indoor/outdoor humidity to condense rapidly in pressurized air lines. Cold, wet air is the #1 killer of pneumatic seals:
-
Lubricate Daily: Add 3 to 4 drops of synthetic pneumatic tool oil directly into the 1/4" NPT air inlet fitting before firing your compressor in the morning.
-
Purge Compressor Tanks: Drain moisture from your air compressor tank valve at the end of every work day to prevent rusted reservoirs and sluggish firing valves.
-
Inline Filtration: If you're running trim jobs in unconditioned spaces, add an inline desiccant dryer or water separator between your hose and the compressor.
Upgrade Your Trim Setup:
Ready to step up your finish game and banish misaligned jambs for good?
Equip your trailer or workshop with pro-grade depth control, magnesium lightweight ergonomics, and backed-by-warranty reliability. Visit the official Freeman store today to claim your upgrade package before the season’s supply runs out!