
When installed incorrectly, exterior siding and fencing can warp, loosen, or develop ugly black rust streaks within a single season. Choosing the right fastener geometry and metal coating is just as critical as choosing the right wood grade or fiber cement profile.
This guide breaks down ring shank vs. smooth shank nails, fastener metallurgy (stainless steel vs. hot-dipped galvanized), and how to set depth properly using pneumatic coil siding nailers to prevent board pull-through and cracking.

1. Shank Geometry: Ring Shank vs. Smooth Shank
The primary distinction between nail types lies in holding power versus drive resistance.
Smooth Shank: (Low friction, higher shear resistance)
Ring Shank: (High withdrawal resistance, locks wood fibers)
Smooth Shank Nails
Smooth shank fasteners have a completely flat, cylindrical barrel.
How They Work: They rely entirely on friction and wood tissue clamping force to stay seated.
Pros: Easiest to drive, higher shear strength (resistance to snapping under lateral movement), and easiest to remove during repairs.
Cons: Prone to "nail backing" or pull-through as wood expands and contracts through seasonal moisture cycles.
Best Uses: Framing, structural shear walls, and temporary outdoor bracing where lateral force dominates pull-out force.
Ring Shank Nails
Ring shank fasteners feature small annular rings machine-rolled along the shank.
How They Work: When driven, wood fibers wedge into the grooves between the rings. This creates a "deadbolt" effect, increasing withdrawal power by up to 300% over smooth nails.
Pros: Virtually eliminates nail popping, board cupping, and wind uplift blow-offs.
Cons: Slower to drive manually (requires pneumatic driving force) and nearly impossible to remove without damaging material.
Best Uses: Vertical lap siding, cedar privacy fences, fiber cement board, and high-wind coastal installations.

2. Fastener Metallurgy: Stainless Steel vs. Galvanized
Matching shank type with the correct metal coating prevents two major exterior failures: ACQ corrosion and tannin bleeding.
|
Fastener Type |
Corrosion Rating |
Tannin Bleed Protection |
Recommended Substrate |
|
316 Stainless Steel |
Maximum (Coastal/Salt Air) |
100% Bleed-Proof |
Western Red Cedar, Redwood, Salt-Spray Zones |
|
304 Stainless Steel |
High (Standard Exterior) |
100% Bleed-Proof |
Cedar, Fiber Cement, Treated Lumber |
|
Hot-Dipped Galvanized (HDG) |
Moderate to High |
Good (Thick Zinc Shield) |
Pressure-Treated Pine, Fir, Standard Fencing |
|
Electro-Galvanized (EG) |
Low (Indoor Only) |
None (Fails Outdoors) |
DO NOT USE FOR EXTERIOR SIDING/FENCING |
Warning on Electro-Galvanized (EG): Never use EG nails for siding or fencing. Their ultra-thin zinc coating quickly degrades under rain and UV rays, resulting in black corrosion streaks and board detachment within months.

Cedar & Redwood
Red cedar and redwood contain natural water-soluble extractives called tannins. When tannins react with standard iron, they produce deep blue-black stains down the face of the board.
-
Rule: Always use 304 or 316 Stainless Steel ring shank nails on cedar and redwood. HDG zinc can react with heavy tannin concentrations over time.
Pressure-Treated Wood
Modern pressure-treated lumber relies on copper-based preservatives (such as ACQ or CA-B). Copper accelerates galvanic corrosion when in contact with plain steel or thin zinc coatings.
-
Rule: Use Hot-Dipped Galvanized (ASTM A153 compliant) or Stainless-Steel ring shank fasteners.
Fiber Cement (James Hardie, SmartSide)
Fiber cement boards are heavy, brittle, and highly susceptible to wind-load pull-through if under-fastened.
-
Rule: Use HDG or Stainless Steel 15-degree ring shank siding nails with a full round head (minimum 0.113" to 0.120" shank diameter).
3. Tool Selection & Setting Depth Without Cracking
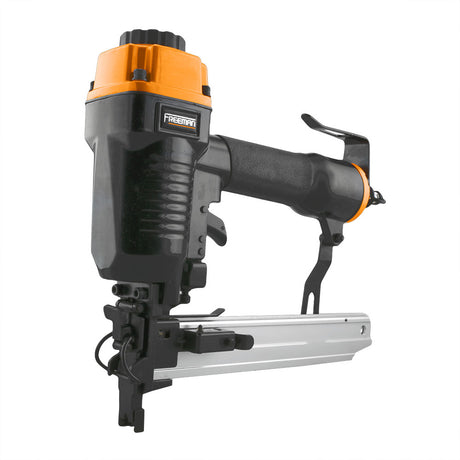
Driving hundreds of ring shank fasteners manually into tough trim or fiber cement causes user fatigue and inconsistent depth. Using a dedicated pneumatic coil siding nailer (such as a Freeman 15-Degree Coil Siding Nailer) streamlines installation while ensuring precise depth control.

Pro-Tips for Setting Siding Depth
-
Use Tool-Free Depth Adjustment: Dial the nailer's depth drive wheel so the nail head sits exactly flush with the surface.
-
Avoid Over-Driving: Over-driven nails break the protective face shell of fiber cement, allowing moisture intrusion and voiding manufacturer warranties.
-
Avoid Under-Driving: High nail heads prevent lap siding from resting flat, creating gaps where water and wind can penetrate.
-
Maintain 90-Degree Angle: Drive fasteners perpendicular to the wall plane. Angular drives cause head blowouts on delicate lap edges.
-
Adjust PSI at the Compressor: Set regulator pressure between 70–90 PSI. Rely on the tool's depth adjustment dial for fine tuning rather than over-pressurizing the hose.

Summary Checklist for Exterior Projects
-
Cedar / Redwood Siding & Fencing: 304/316 Stainless Steel + Ring Shank
-
Fiber Cement Lap Siding: Hot-Dipped Galvanized or Stainless + Ring Shank (Full Round Head)
-
Pressure-Treated Fence Pickets: Hot-Dipped Galvanized (HDG) + Ring Shank
-
Sheathing & Framing: Hot-Dipped Galvanized + Smooth Shank or Ring Shank
-
Tool Set-Up:
Freeman G2CN65 15-Degree Pneumatic Coil Siding Nailer with rubber no-mar tip engaged.