
As summer winds down and the back-to-school rush takes over, entryways quickly become ground zero for clutter. Shoes, backpacks, jackets, and sports gear can turn your front door into an obstacle course overnight.
Creating a dedicated entryway drop zone built-in is one of the highest-impact DIY projects you can tackle before autumn arrives. Not only does a custom mudroom bench bring instant order to daily chaos, but it also adds significant custom-woodwork character and value to your home. In this step-by-step guide, we’ll show you how to construct a durable, beautiful mudroom bench and hook rack in a single weekend using essential pneumatic tools that make short work of cabinetry and trim.
Tools & Materials Required

Materials
1. Sheet Goods & Lumber
-
Lumber / Plywood for Framework & Cubbies (Sage Green Structure):
-
3/4" Cabinet-Grade Plywood (Oak, Birch, or MDO): For the main outer frame, vertical cubby dividers (top and bottom), and top shelf carcass.
-
1/4" Plywood / Hardboard (Optional): For backing behind the lower cubbies or top cubbies if not attaching directly to drywall.
-
Wooden Bench Top:
-
1.5" Thick Hardwood Board (e.g., White Oak, Butcher Block, or laminated hardwood slab): Stained and clear-coated to match the natural wood tones.
-
Wainscoting / Wall Accent:
-
1/4" MDF / Plywood Backer Board (or Smooth Wall Surface) for board-and-batten backing.
-
1 x 3 or 1 x 4 MDF / Poplar Boards: For the vertical battens and horizontal trim band of the board-and-batten wall.
2. Trim & Face Framing
-
1 x 2 Poplar / Pine Boards: Face-framing around the cubby edges, face face-plates, and front stiles.
-
Baseboard Trim: Matches the room’s existing trim to wrap around the bottom/sides for a seamlessly integrated look.
-
Edge Banding (Veneer Tape): For exposed edges of plywood shelves (if not using solid wood face frames).
3. Hardware & Accessories
-
Coat Hooks: 5x Heavy-duty cast iron or matte black dual/single coat hooks.
-
Fasteners:
-
Pocket hole screws (1.25" and 2.5").
-
2" to } 3" Framing / Cabinet Screws (to anchor the frame securely into wall studs).
-
Brad nails / Finish nails (1.25" and 2").
-
Adhesives & Fillers:
-
Construction adhesive (e.g., Liquid Nails).
-
Wood glue (Titebond II or III).
-
Paintable wood filler / Caulk for seams, nail holes, and trim joints.
4. Paint & Finishing Supplies
-
Color of Choice Satin or Semi-Gloss finish: For outer frame, cubbies, and base trim.
-
Off-White / Cream Paint (Semi-Gloss or Satin finish): For board-and-batten wall background.
-
Wood Stain & Clear Coat (Polyurethane/Polyacrylic): For the natural oak bench top.
-
Painter’s Tape, Sandpaper (120, 180, 220 grit), Paintbrushes, foam roller,& Caulk Gun.
5. Tools
-
Freeman G2FN64 16-Gauge Straight Finish Nailer (for frame assembly & trim attachment.
-
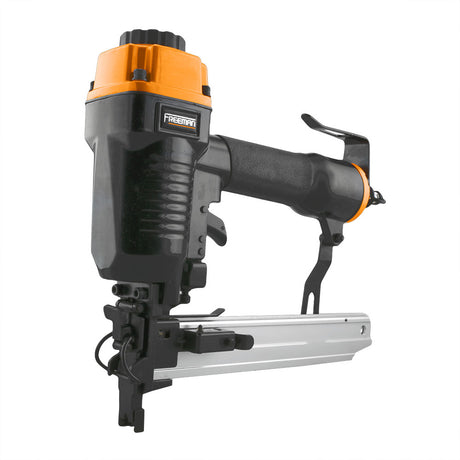
Freeman G2ST9040 18-Gauge 1/4" Narrow Crown Stapler (for attaching 1/4" backing sheets)
-
Fasteners: 2" 16-Gauge Finish Nails & 1" 18-Gauge 1/4" Narrow Crown Staples
-
Miter saw & circular saw (or track saw / table saw for sheet goods)
-
Pocket hole jig (Kreg jig) & clamps
-
Stud finder, level, & tape measure
Step-by-Step Construction Guide
Step 1: Prep the Space & Layout
-
Locate Studs: Use a stud finder to locate all wall studs across the back and side walls where the unit will sit. Mark them clearly above where the unit will reach.
-
Remove Existing Baseboards: Carefully pry off existing baseboards along the floor where the unit will rest so it fits flush against the wall.
-
Mark Dimensions: Measure and draw out your full outline on the back wall using a level to verify everything will be plumb and level.
Step 2: Build the Lower Cubby Bench Base
-
Cut Plywood Panels: Cut 3/4" plywood for the bottom base plate, top support panel (under the bench), two outer side walls, and two internal divider walls.
-
Drill Pocket Holes: Drill pocket holes on the underside of horizontal panels and along the back edges of vertical panels.
-
Assemble the Box:
-
Connect the outer sides and internal dividers to the bottom plate using 1-1/4" pocket hole screws and wood glue.
-
Attach the top plywood support sheet to cap the lower box.
-
Anchor to Wall: Slide the lower carcass into position, level it (use shims underneath if your floor is uneven), and secure it into wall studs using 2-1/2" cabinet screws through a 1x4 support cleat attached at the upper back of the box.
Step 3: Fabricate & Install the Oak Bench Top
-
Cut to Size: Measure the exact width and depth of the installed lower base. Add a 1/2" overhang on the front and exposed side. Cut your 1.5" hardwood slab / butcher block to size.
-
Sand & Stain: Pre-sand the oak bench through 120, 180, and 220 grit. Apply your desired wood stain, followed by 2–3 coats of protective clear coat (polyurethane or polyacrylic), sanding lightly with fine grit between coats.
-
Secure the Bench: Once dry, lay the bench top onto the lower cubby carcass. Secure it from underneath by driving 1-1/4" screws up through the plywood top panel into the underside of the oak top.
Step 4: Build & Install Upper Cubbies
-
Assemble the Top Carcass: Cut 3/4" plywood for the top unit's top plate, bottom plate, two outer side panels, and two vertical dividers.
-
Join the Structure: Assemble the upper box using wood glue and pocket hole screws, ensuring all openings are equal in width.
-
Mount the Upper Unit:
-
Attach a sturdy 1x4 horizontal cleat inside the top back of the upper carcass.
-
Lift the upper unit into place (resting on temporary support blocks or side supports).
-
Secure it firmly into the wall studs using 3" cabinet screws through the rear cleat.

Step 5: Install the Board & Batten Accent Wall
-
Backer Panel (Optional): If your drywall is smooth, paint it directly with off-white/cream paint. If textured, attach a thin 1/4" smooth sheet panel to the wall section between the bench and top cubbies.
-
Horizontal Board: Attach a 1x4 board directly beneath the upper cubby structure using construction adhesive and brad nails into studs.
-
Vertical Battens: Space 1x3 or 1x4 MDF/poplar boards evenly across the wall (aligned with the hooks in the photo). Glue and brad-nail them into place, ensuring every batten is vertically level.
Step 6: Face Framing, Trim & Baseboard Integrations
-
Face Frame: Apply 1x2 poplar trim across the front exposed plywood edges of both upper and lower cubbie dividers using wood glue and finish nails.
-
Edge Banding: Alternatively, apply iron-on wood veneer tape to raw plywood edges before painting if not using 1x2 face frames.
-
Baseboard Reinstallation: Wrap matching baseboard trim around the front/side base of the unit to give it a seamless, built-in look.
Step 7: Caulk, Fill, Sand & Paint
-
Fill Holes & Seams: Fill all nail holes with paintable wood filler. Apply paintable caulk along all internal corners, wall joints, and seams between wood trim and the wall.
-
Sand Smooth: Once dry, sand all filled nail holes flush.
-
Prime & Paint:
-
Wainscoting: Apply 2 coats of off-white/cream paint to the board-and-batten backing and vertical battens.
-
Built-in Structure: Apply 2 coats of satin or semi-gloss muted sage green paint to the upper and lower cubbies, face frames, and base trim. Protect the oak bench top with painter’s tape while painting.
Step 8: Install Hardware & Accessories
-
Mount Hooks: Center individual heavy-duty black coat hooks onto each vertical board-and-batten section. Pre-drill pilot holes and drive the mounting screws firmly into the wall/battens.
-
Final Touches: Add storage baskets to the upper cubbies, shoes in the lower section, and enjoy your new custom mudroom entry!
Finished Project Showcase

With clean lines, solid structural assembly, and dedicated storage compartments, your brand-new entryway drop zone is ready to handle backpacks, shoes, jackets, and morning rushes for years to come.
Upgrade Your DIY Toolkit
Having the right tools makes all the difference between a frustrating project and a seamless, professional-looking build. Explore Freeman’s complete lineup of finish nailers, narrow crown staplers, and combo kits to tackle your next home transformation with confidence.
Freeman G2FN64 16-Gauge Straight Finish Nailer
Freeman G2ST9040 18-Gauge 1/4" Narrow Crown Stapler